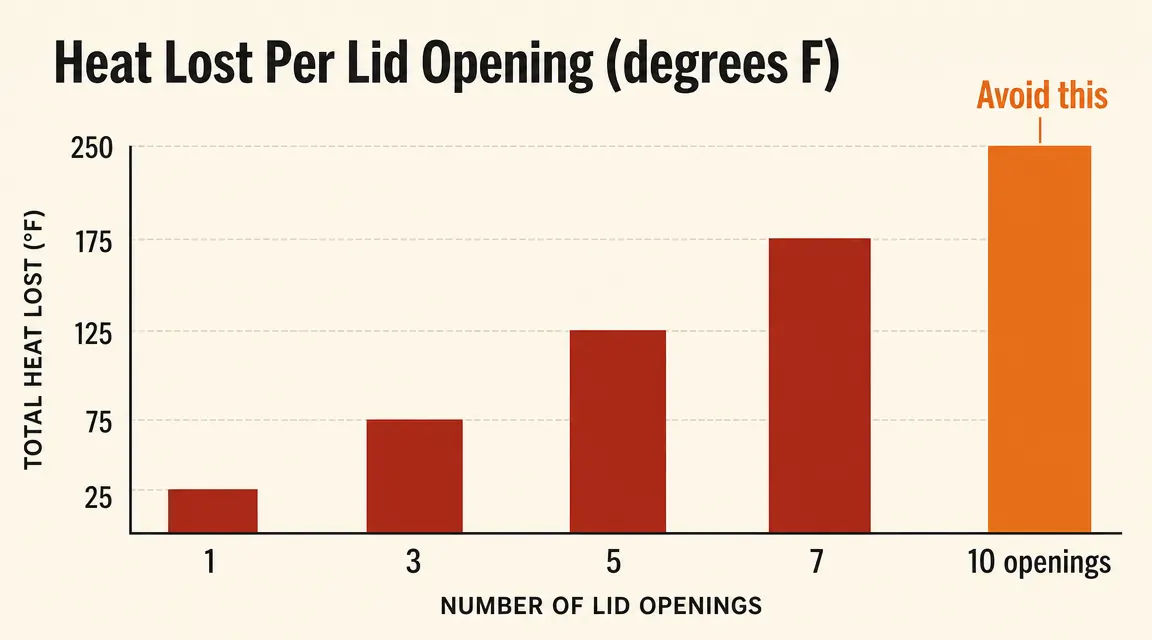
I used to open my smoker every forty-five minutes to check on a brisket. I thought I was being a good pitmaster. What I was actually doing was bleeding off heat, wrecking the bark buildup, and extending my cook by at least two hours. The first time I tracked it, I counted eleven lid lifts on a fourteen-hour brisket. Each one dropped the grate temperature by 30 to 50 degrees and took ten to fifteen minutes to recover. That is a lot of lost time and a lot of dried-out surface.
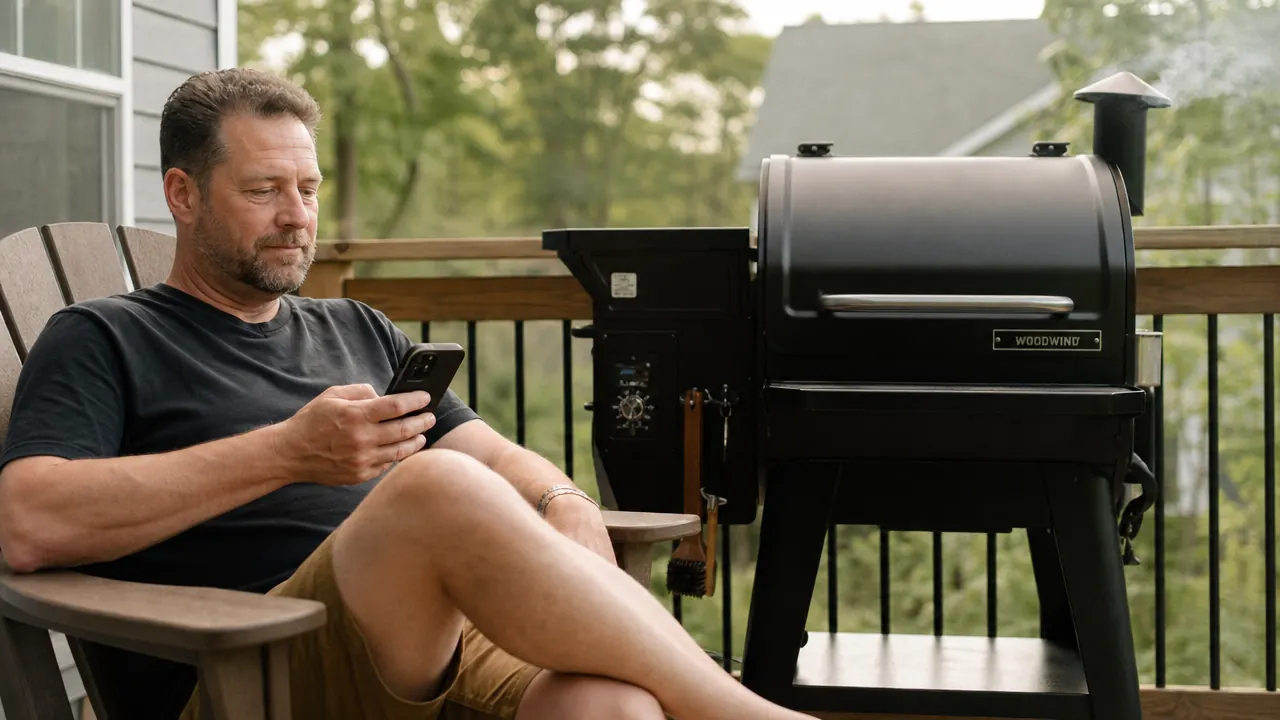
A wireless meat thermometer fixes all of that. You insert the probes before the lid goes down, connect to your phone, and you can watch the internal temperature rise in real time without touching the grill. I switched to this method about a year ago using the Govee Bluetooth Meat Thermometer, which runs two probes simultaneously from a single transmitter. Now I genuinely do not open the lid until the meat tells me it is ready. The whole process is simpler than it sounds, but there are a few setup steps that matter a lot. Get them wrong and your readings will drift, your probes will fail early, or you will miss the stall entirely.
Your meat is overcooking right now because you keep peeking. Here is the fix.
The Govee Bluetooth Meat Thermometer uses two probes and a 230-foot Bluetooth range to keep you off the grill and on the patio. Over 9,600 verified buyers use it exactly as described in this guide.
Amazon Check Today's Price on Amazon →Step 1: Choose the Right Thermometer for the Job
Not every wireless thermometer works the same way, and the wrong tool will get you off on the wrong foot before the cook even starts. For most backyard setups, you want a Bluetooth thermometer with at least two probes. One probe goes into the meat and one can optionally monitor ambient grate temperature, giving you a complete picture of what is happening inside the cooker.
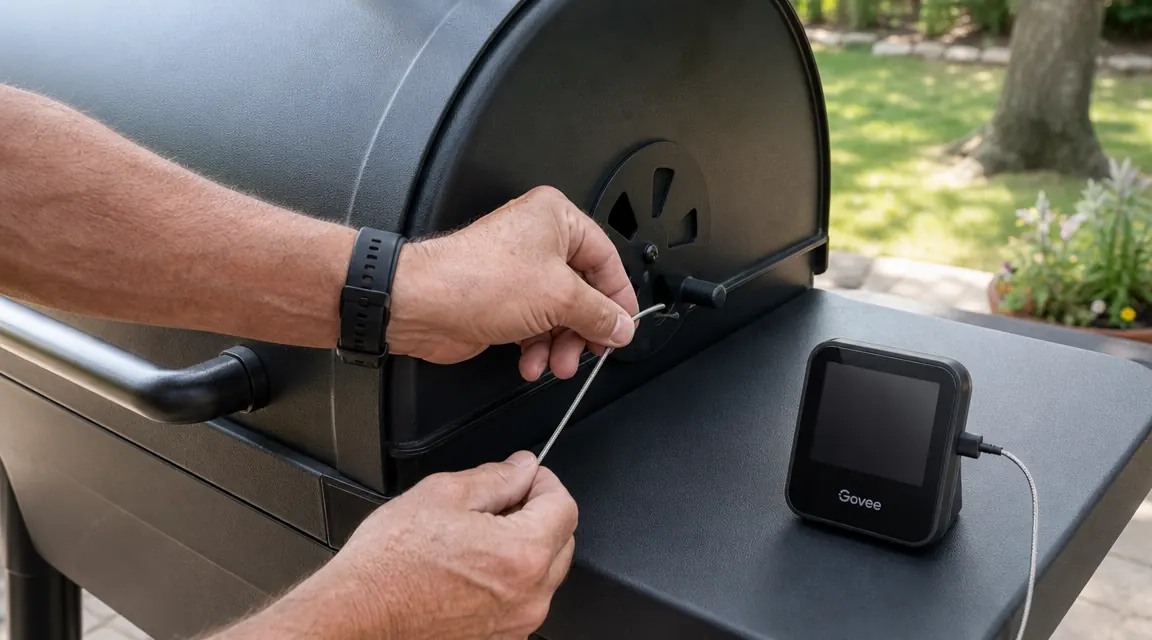
The Govee Bluetooth Meat Thermometer (ASIN B08317TDP1) is the one I reach for on every cook. It ships with two probes, a compact transmitter that sits on the grill shelf or nearby surface, and an app that graphs temperature over time so you can actually see the stall when it happens instead of wondering why the temp has not moved in three hours. The Bluetooth range on the Govee is rated at 230 feet, which is enough to cover most backyards, a garage setup, or a patio where you are not more than a few walls away from the grill. If you need Wi-Fi range because your smoker sits far from the house, step up to a Wi-Fi model. For most weekend setups, Bluetooth is plenty.
Before you commit to any thermometer, check two things. First, confirm the probe cable is rated for your max cooking temperature. Govee's braided cable handles up to 716 degrees Fahrenheit, which covers any pellet smoker, kamado, or offset running normal low-and-slow or searing temps. Second, look for a model with individual alarm settings per probe. You want to set a high alarm on the meat channel so your phone buzzes when the brisket hits 195, not a single shared alarm that could be for either channel.
Step 2: Insert the Probes Correctly Before the Lid Goes Down
Probe placement makes or breaks your reading accuracy. The tip of the probe needs to sit in the thickest part of the meat, away from bone, fat pockets, and the surface. Bone conducts heat differently than muscle, so a probe tip touching bone will read 10 to 20 degrees higher than the actual internal temperature of the meat around it. Fat pockets do the same thing. You want the metal sensor sitting in solid muscle tissue in the dead center of the thickest section.
For a whole brisket, insert the probe into the flat from the side, angling toward the center of the flat, not the point. The flat dries out faster, so it is the section you need to monitor most closely. If you are running two probes, put the second one in the point. This lets you track both muscles and catch the flat's pull temperature without guessing. For a pork shoulder, aim for the center of the shoulder blade side, avoiding the bone that runs through the middle. For chicken, the thickest part of the breast or the thigh joint is your target zone, again away from any bone.
Once the probe is placed, route the cable so it exits the grill at a corner gap or under the lid seal without being pinched. Most grill lids have a slight flex that lets the thin probe cable pass without cutting it, but if your lid sits tight, use a folded piece of foil under the cable at the point of contact to cushion it. A cut cable is not covered under warranty and a partial cut will give you erratic readings mid-cook.
Step 3: Set Up the App and Configure Your Alarms
Download the Govee Home app before you start the cook, not after. Pairing the transmitter takes about two minutes and the app walks you through it step by step. Once paired, you will see both probe channels displayed with live temperature readouts. Tap on each channel to set your alarms.
For a brisket, I set a low alarm at 150 degrees Fahrenheit so the app flags me when I am approaching the stall, which typically happens between 150 and 165. I set a high alarm at 203 degrees because that is my personal pull temperature for brisket. For pork shoulder, I set the high alarm at 205. For chicken breast, 160 degrees with a carry-over to 165 at rest. For chicken thigh, 175. Having the alarms set before you close the lid means you can walk away without worrying. The phone buzzes when it needs your attention, and until then, you leave the lid alone.
One setting that most people miss is the graph view. Tap the chart icon in the Govee app and it will plot your temperature curve in real time. This is where you see the stall as a flat line in the middle of the graph. Seeing it graphically removes the anxiety of wondering whether your cook is on track. If the flat line stretches for two to three hours between 155 and 165 degrees, that is completely normal. Do not open the lid. Do not add more heat. The stall is the collagen breaking down into gelatin and that is exactly what you want happening.

Step 4: Manage the Stall Without Lifting the Lid
The stall is the moment most backyard pitmasters break. The temperature stops climbing, sometimes for three hours or more, and the instinct is to open the lid, poke the meat, and wonder what went wrong. Nothing went wrong. The stall is evaporative cooling at work: the moisture leaving the surface of the meat is cooling it at the same rate as the smoker is heating it. Your wireless thermometer is your proof that the process is working.
If you want to push through the stall faster, you can wrap the brisket in butcher paper or foil once it hits 165 degrees internal. Wrapping reduces the evaporative surface, cuts the stall short, and speeds up the final temperature climb. The Govee's alarm will tell you exactly when you hit that 165 threshold. Close the lid, grab your butcher paper, open the grill only long enough to wrap quickly, then close it back up. That is your one lid lift for the entire cook, and it is a purposeful one with everything staged in advance.
The first brisket I cooked without opening the lid once came out with a bark so thick I thought I had burned it. I had not. That is what happens when you stop bleeding off heat every forty-five minutes.
Step 5: Know Your Pull Temperature and Rest It Right
The Govee app alarm handles this step for you, but you still need to know your target temperatures before you set them. Different meats have different pull points and getting them right is the difference between dry and perfect. Here are the numbers I use on every cook. Brisket: pull at 200 to 205 degrees internal and rest a minimum of one hour, two hours if you have time. Pork shoulder: pull at 200 to 205 degrees internal and rest at least one hour. Chicken breast: pull at 160 degrees, carry-over to 165 during a five-minute rest. Chicken thigh: pull at 175 degrees for fall-off-the-bone texture. Pork ribs: ribs are harder to probe because they are thin, but aim for 195 to 203 degrees in the thickest part between the bones.
When the Govee alarm fires, you have your one and only lid lift. Remove the meat, place it on a cutting board or sheet pan, tent it loosely with foil, and let it rest. Pull the probes out and clean them immediately while they are still warm. The food residue wipes off easily when warm and is nearly impossible to remove once it cools and hardens onto the metal. A quick pass with a damp cloth or paper towel is all it takes.
What Else Helps
A wireless thermometer solves the peeking problem, but a few other habits compound the benefit. First, get a reliable pellet grill or charcoal setup that holds temperature on its own without you adjusting vents every twenty minutes. An inconsistent cooker means more interventions regardless of your thermometer. If you are shopping for a pellet grill that runs steady temperature without babysitting, the Z Grills ZPG-450A2 is what I have been running alongside the Govee for the past year and a half. The PID V3.0 controller on that machine holds within plus or minus five degrees of your set point, which is as stable as any pellet grill I have tested at this price point. See my full write-up in the Z Grills 450A2 long-term review.
Second, do your prep work before the meat goes on. Season, trim, inject, and stage everything including your wrap materials and resting vessel before you close the lid. If you need to wrap in butcher paper at 165, have the paper pre-torn and sitting on the prep table. If you are adding wood chunks partway through, put them on with the initial load so you do not need to open the lid for fuel additions. Every unplanned lid lift costs you heat and time. Plan to eliminate all of them before the cook starts.
Third, if you are running a long cook overnight or during a game day where you genuinely cannot monitor your phone, enable the Govee app's push notifications so the alarm fires even if your phone screen is off. On iOS, make sure the Govee Home app has notification permissions turned on in Settings. On Android, disable battery optimization for the app so it is not killed in the background. A silenced alarm is as useless as no alarm at all. For a full look at how the Govee holds up over extended cooks including overnight smokes, check my year-long Govee thermometer review.
Set the probes, close the lid, go sit down. The Govee alerts you when it matters.
The Govee Bluetooth Meat Thermometer includes two probes, a compact transmitter, and a free app with temperature graphing and per-probe alarms. Rated 4.4 stars across more than 9,600 reviews. Works on pellet grills, offsets, charcoal, and ovens.
Amazon Check Today's Price on Amazon →